TDengine on Kubernetes
- Author: Huo Linhe lhhuo@taosdata.com
- Updated:2021-06-09 16:24:00
This document is for TDengine deployment on Kubernetes(k8s). All the things we do is for who love TDengine and want to take it to k8s. We are hosting the ducumentation on taosdata/TDengine-Operator. Anyone want to help improve the ducumentations could edit the markdown files.
If you encounter problems following the operations, you can always add our official WeChat "tdengine" to join our chat group to get help from us and other TDengine users.
Note: Please switch 2.0 branch if you want to run Kubernetes with TDengine 2.x.
Start with Kubernetes
We suppose you have known how kubernetes(kubectl) work and a kubernetes environment in use.
If you start from scratch, you can try kubernetes with minikube or install with rancher by following the steps in next chapter.
Try kubernetes with Minikube
This document will apply to linux host, others would go https://minikube.sigs.k8s.io/docs/start/ for more documentations.
Install
First, download and install minikube
curl -LO https://storage.googleapis.com/minikube/releases/latest/minikube-linux-amd64
sudo install minikube-linux-amd64 /usr/local/bin/minikube
Start
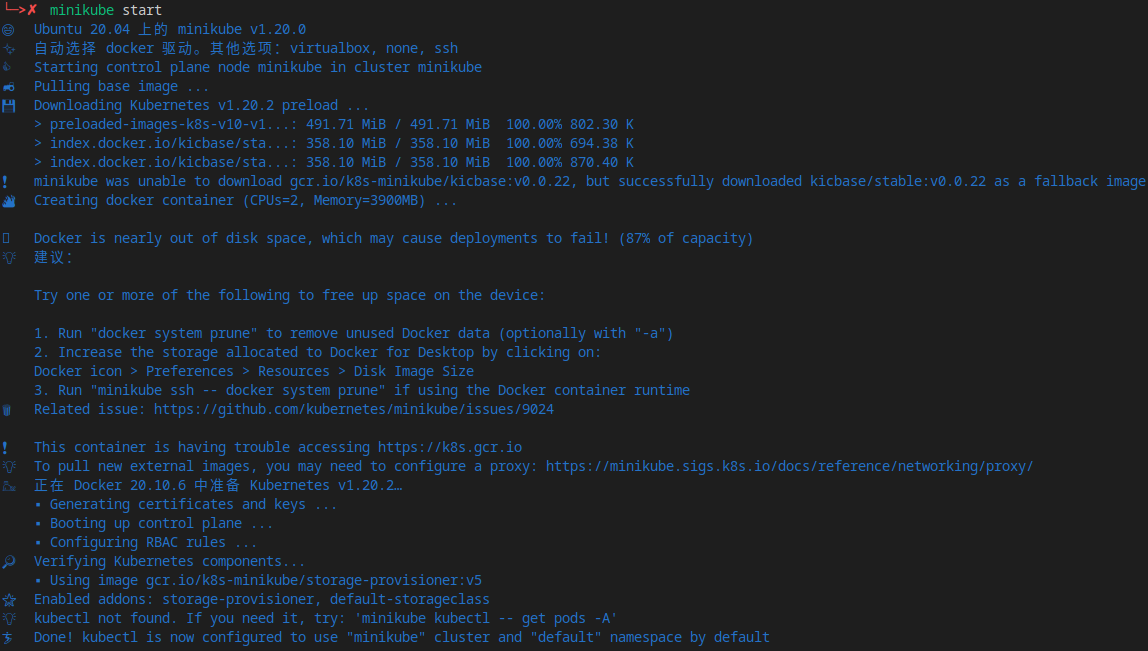
Start a minikube cluster
minikube start
Kubectl
In minikube, you can use kubectl like:
minikube kubectl -- get pods -A
But you can install and use kubectl as usual:
curl -LO "https://dl.k8s.io/release/$(curl -L -s https://dl.k8s.io/release/stable.txt)/bin/linux/amd64/kubectl"
sudo install kubectl /usr/local/bin/kubectl
Get pods in all namespaces:
kubectl get pods -A
Get storage class:
kubectl get sc
Note that minikube will enable default storage class standard, which you should keep in mind.
Dashboard
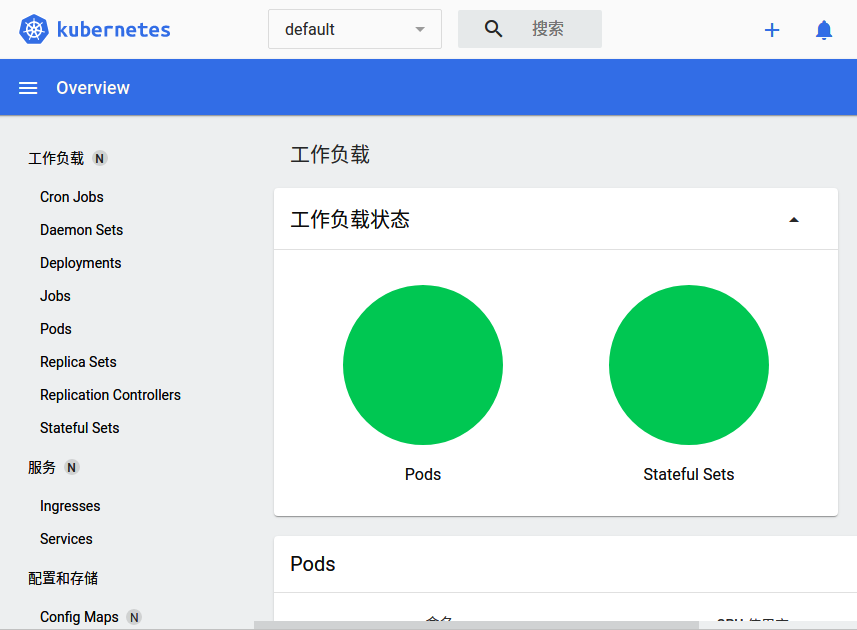
Minikube provide dashboard as an extension, start it with:
minikube dashboard
It will open in web browser:
Introduction to Kubernetes
We suppose you have known how kubernetes work and a kubernetes environment in use.
Setup K8s Cluster with Rancher
Claim: I've built this at May 26 2021 in Beijing, China(UTC+8), China. Please refer to fitted documentations if any step changed.
Install RancherD to deploy Rancher
For most of the cases, just run the rancherd installer.
curl -sfL https://get.rancher.io | sh -
Alternatively, you can download the latest rancherd package from github releases assets.
# fill the proxy url if you use one
export https_proxy=
curl -s https://api.github.com/repos/rancher/rancher/releases/latest \
  |jq '.assets[] |
    select(.browser_download_url|contains("rancherd-amd64.tar.gz")) |
    .browser_download_url' -r \
  |wget -ci -
And install it.
tar xzf rancherd-amd64.tar.gz -C /usr/local
Then start the rancherd service.
systemctl enable rancherd-server
systemctl start rancherd-server
Keep tracking with the service.
journalctl -fu rancherd-server
End with log successfully:
"Event occurred" object="cn120" kind="Node" apiVersion="v1" \
type="Normal" reason="Synced" message="Node synced successfully"
Setup kubeconfig and kubectl
Once the Kubernetes cluster is up, set up RancherD’s kubeconfig file and kubectl:
export KUBECONFIG=/etc/rancher/rke2/rke2.yaml
export PATH=$PATH:/var/lib/rancher/rke2/bin
Check rancher status with kubectl:
kubectl get daemonset rancher -n cattle-system
kubectl get pod -n cattle-system
Result:
NAME      DESIRED   CURRENT   READY   UP-TO-DATE   AVAILABLE   NODE SELECTOR                         AGE
rancher   1         1         1       1            1           node-role.kubernetes.io/master=true   36m
NAME                               READY   STATUS      RESTARTS   AGE
helm-operation-5c2wd               0/2     Completed   0          34m
helm-operation-bdxlx               0/2     Completed   0          33m
helm-operation-cgcvr               0/2     Completed   0          34m
helm-operation-cj4g4               0/2     Completed   0          33m
helm-operation-hq282               0/2     Completed   0          34m
helm-operation-lp5nn               0/2     Completed   0          33m
rancher-kf592                      1/1     Running     0          36m
rancher-webhook-65f558c486-vrjz9   1/1     Running     0          33m
Set Rancher Password
rancherd reset-admin
You would see like this:
INFO[0000] Server URL: https://*.*.*.*:8443
INFO[0000] Default admin and password created. Username: admin, Password: ****
Point to server url, you can see the login page.
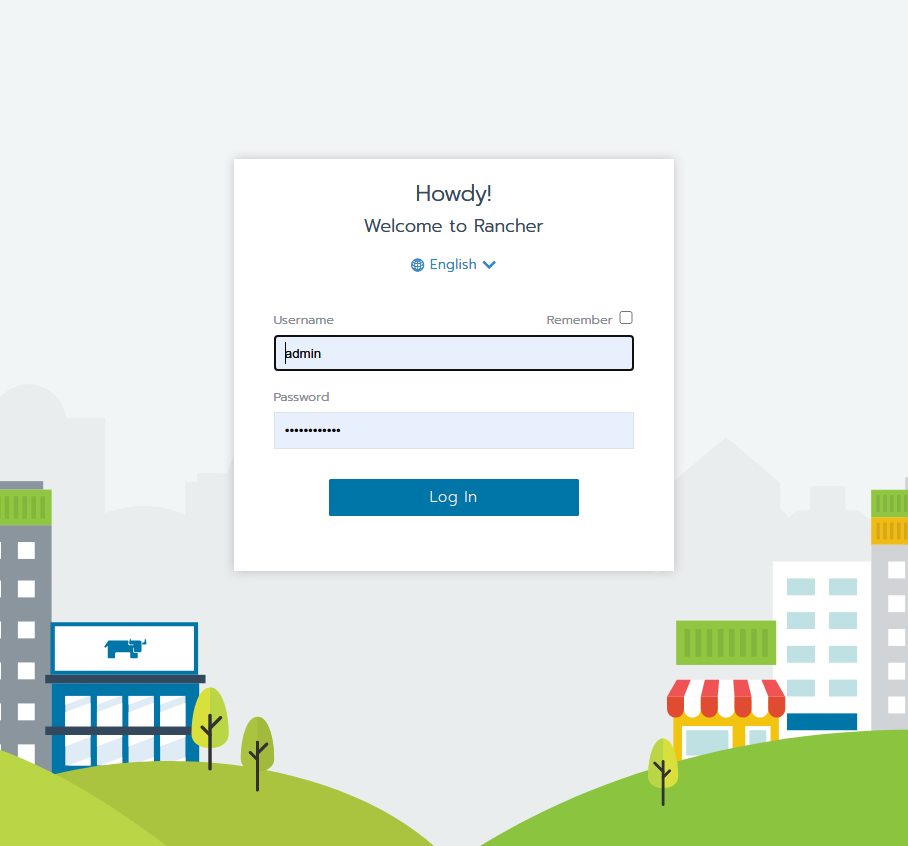
Type right username and password, then enjoy rancher powered cluster dashboard.
HA Settings
Check the token in /var/lib/rancher/rke2/server/node-token.
Install rancherd-server in other nodes like first node:
tar xzf rancherd-amd64.tar.gz -C /usr/local
systemctl enable rancherd-server
Prepare config dir:
mkdir -p /etc/rancher/rke2
Change the config file in /etc/rancher/rke2/config.yaml.
server: https://192.168.60.120:9345
token: <the token in /var/lib/rancher/rke2/server/node-token>
Start rancherd
systemctl start rancherd-server
journalctl -fu rancherd-server
Other nodes just copy the config.yaml and start rancherd, and those will be joined to cluster automatically.
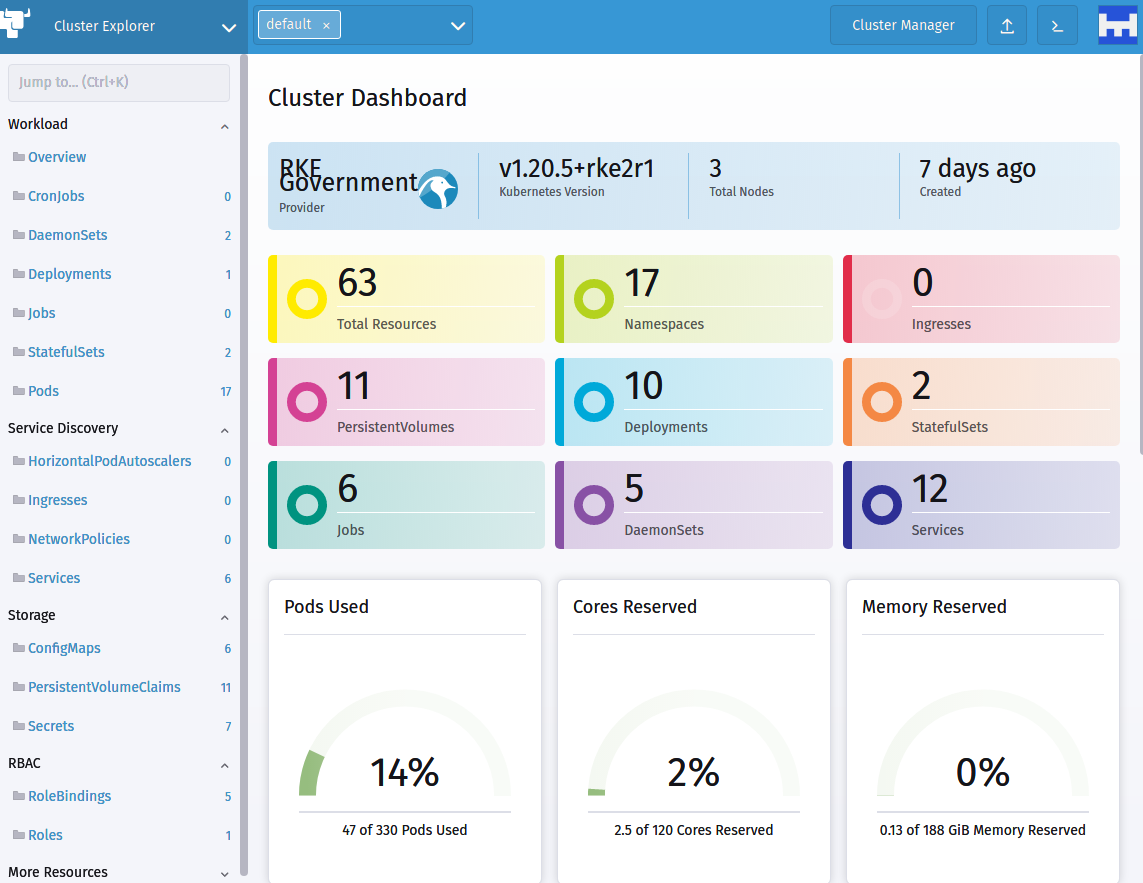
Type kubectl get daemonset rancher -n cattle-system:
NAME      DESIRED   CURRENT   READY   UP-TO-DATE   AVAILABLE   NODE SELECTOR                         AGE
rancher   3         3         3       3            3           node-role.kubernetes.io/master=true   129m
Three nodes rancher+k8s cluster are avalibale now.
K8s Starter
Let's start using kubernetes from some starter project. If you are familiar enough with k8s, just ignore the chapter and go on.
StatefulSets
In starter/stateful-nginx.yaml:
apiVersion: v1
kind: Service
metadata:
  name: nginx
  labels:
    app: nginx
spec:
  ports:
  - port: 80
    name: web
  clusterIP: None
  selector:
    app: nginx
---
apiVersion: apps/v1
kind: StatefulSet
metadata:
  name: web
spec:
  selector:
    matchLabels:
      app: nginx # has to match .spec.template.metadata.labels
  serviceName: "nginx"
  replicas: 3 # by default is 1
  template:
    metadata:
      labels:
        app: nginx # has to match .spec.selector.matchLabels
    spec:
      terminationGracePeriodSeconds: 10
      containers:
      - name: nginx
        image: nginx
        ports:
        - containerPort: 80
          name: web
        volumeMounts:
        - name: www
          mountPath: /usr/share/nginx/html
  volumeClaimTemplates:
  - metadata:
      name: www
    spec:
      accessModes: [ "ReadWriteOnce" ]
      storageClassName: "csi-rbd-sc"
      resources:
        requests:
          storage: 1Gi
kubectl apply -f starter/stateful-nginx.yaml
ConfigMap Mount as Volume
A config map:
---
apiVersion: v1
kind: ConfigMap
metadata:
  name: starter-config-map
data:
  debugFlag: 135
  keep: 3650
---
apiVersion: v1
kind: Pod
metadata:
  name: starter-config-map-as-volume
spec:
  containers:
    - name: test-container
      image: busybox
      command: [ "/bin/sh", "-c", "ls /etc/config/" ]
      volumeMounts:
      - name: starter-config-map-vol
        mountPath: /etc/config
  volumes:
    - name: starter-config-map-vol
      configMap:
        # Provide the name of the ConfigMap containing the files you want
        # to add to the container
        name: starter-config-map
  restartPolicy: Never
Setup TDengine Cluster on Kubernetes
In this chapter, we hope to introduce how to use YAML files to create a TDengine cluster from scratch step by step in the first subsection, and focus on the common operations of TDengine in the Kubernetes environment. You can learn about the deployment mechanism of TDengine in the Kubernetes cluster. The second section introduces how to use Helm to deploy TDengine. It is recommended to use the Helm Chart deployment method in the production environment. We will continue to update the TDengine Chart, so stay tuned.
Setup TDengine Cluster on Kubernetes
Service
Service config taosd-service.yaml for each port we will use, here note that the metadata.name (setted as "taosd") will be used in next step:
---
apiVersion: v1
kind: Service
metadata:
  name: "taosd"
  labels:
    app: "tdengine"
spec:
  ports:
  - name: tcp6030
    protocol: "TCP"
    port: 6030
  - name: tcp6041
    protocol: "TCP"
    port: 6041
  selector:
    app: "tdengine"
StatefulSet
We use StatefulSet config tdengine.yaml for TDengine.
---
apiVersion: apps/v1
kind: StatefulSet
metadata:
  name: "tdengine"
  labels:
    app: "tdengine"
spec:
  serviceName: "taosd"
  replicas: 3
  updateStrategy:
    type: RollingUpdate
  selector:
    matchLabels:
      app: "tdengine"
  template:
    metadata:
      name: "tdengine"
      labels:
        app: "tdengine"
    spec:
      containers:
        - name: "tdengine"
          image: "tdengine/tdengine:3.0.7.1"
          imagePullPolicy: "IfNotPresent"
          ports:
            - name: tcp6030
              protocol: "TCP"
              containerPort: 6030
            - name: tcp6041
              protocol: "TCP"
              containerPort: 6041
          env:
            # POD_NAME for FQDN config
            - name: POD_NAME
              valueFrom:
                fieldRef:
                  fieldPath: metadata.name
            # SERVICE_NAME and NAMESPACE for fqdn resolve
            - name: SERVICE_NAME
              value: "taosd"
            - name: STS_NAME
              value: "tdengine"
            - name: STS_NAMESPACE
              valueFrom:
                fieldRef:
                  fieldPath: metadata.namespace
            # TZ for timezone settings, we recommend to always set it.
            - name: TZ
              value: "Asia/Shanghai"
            # TAOS_ prefix will configured in taos.cfg, strip prefix and camelCase.
            - name: TAOS_SERVER_PORT
              value: "6030"
            # Must set if you want a cluster.
            - name: TAOS_FIRST_EP
              value: "$(STS_NAME)-0.$(SERVICE_NAME).$(STS_NAMESPACE).svc.cluster.local:$(TAOS_SERVER_PORT)"
            # TAOS_FQND should always be set in k8s env.
            - name: TAOS_FQDN
              value: "$(POD_NAME).$(SERVICE_NAME).$(STS_NAMESPACE).svc.cluster.local"
          volumeMounts:
            - name: taosdata
              mountPath: /var/lib/taos
          startupProbe:
            exec:
              command:
                - taos-check
            failureThreshold: 360
            periodSeconds: 10
          readinessProbe:
            exec:
              command:
                - taos-check
            initialDelaySeconds: 5
            timeoutSeconds: 5000
          livenessProbe:
            exec:
              command:
                - taos-check
            initialDelaySeconds: 15
            periodSeconds: 20
  volumeClaimTemplates:
    - metadata:
        name: taosdata
      spec:
        accessModes:
          - "ReadWriteOnce"
        storageClassName: "standard"
        resources:
          requests:
            storage: "5Gi"
Start the cluster
kubectl apply -f taosd-service.yaml
kubectl apply -f tdengine.yaml
The script will create a three node TDengine cluster on k8s.
Execute show dnodes in taos shell:
kubectl exec -i -t tdengine-0 -- taos -s "show dnodes"
kubectl exec -i -t tdengine-1 -- taos -s "show dnodes"
kubectl exec -i -t tdengine-2 -- taos -s "show dnodes"
Well, the current dnodes list shows:
Welcome to the TDengine shell from Linux, Client Version:3.0.0.0
Copyright (c) 2022 by TAOS Data, Inc. All rights reserved.

taos> show dnodes
   id   |            endpoint            | vnodes | support_vnodes |   status   |       create_time       |              note              |
============================================================================================================================================
      1 | tdengine-0.taosd.default.sv... |      0 |            256 | ready      | 2022-06-22 15:29:49.049 |                                |
      2 | tdengine-1.taosd.default.sv... |      0 |            256 | ready      | 2022-06-22 15:30:11.895 |                                |
      3 | tdengine-2.taosd.default.sv... |      0 |            256 | ready      | 2022-06-22 15:30:33.007 |                                |
Query OK, 3 rows affected (0.004610s)
Scale Up
TDengine on Kubernetes could automatically scale up with:
kubectl scale statefulsets tdengine --replicas=4
Check if scale-up works:
kubectl get pods -l app=tdengine
Results:
NAME         READY   STATUS    RESTARTS   AGE
tdengine-0   1/1     Running   0          2m9s
tdengine-1   1/1     Running   0          108s
tdengine-2   1/1     Running   0          86s
tdengine-3   1/1     Running   0          22s
Check TDengine dnodes:
kubectl exec -i -t tdengine-0 -- taos -s "show dnodes"
Results:
Welcome to the TDengine shell from Linux, Client Version:3.0.0.0
Copyright (c) 2022 by TAOS Data, Inc. All rights reserved.

taos> show dnodes
   id   |            endpoint            | vnodes | support_vnodes |   status   |       create_time       |              note              |
============================================================================================================================================
      1 | tdengine-0.taosd.default.sv... |      0 |            256 | ready      | 2022-06-22 15:29:49.049 |                                |
      2 | tdengine-1.taosd.default.sv... |      0 |            256 | ready      | 2022-06-22 15:30:11.895 |                                |
      3 | tdengine-2.taosd.default.sv... |      0 |            256 | ready      | 2022-06-22 15:30:33.007 |                                |
      4 | tdengine-3.taosd.default.sv... |      0 |            256 | ready      | 2022-06-22 15:31:36.204 |                                |
Query OK, 4 rows affected (0.009594s)
Scale Down
Let's try scale down from 4 to 3.
To perform a right scale-down, we should drop the last dnode in taos shell first:
kubectl exec -i -t tdengine-0 -- taos -s "drop dnode 4"
Then scale down to 3.
kubectl scale statefulsets tdengine --replicas=3
Extra replicas pods will be terminated, and retain 3 pods.
Type kubectl get pods -l app=tdengine to check pods.
NAME         READY   STATUS    RESTARTS   AGE
tdengine-0   1/1     Running   0          4m17s
tdengine-1   1/1     Running   0          3m56s
tdengine-2   1/1     Running   0          3m34s
Also need to remove the pvc(if no, scale-up will be failed next):
kubectl delete pvc taosdata-tdengine-3
Now your TDengine cluster is safe.
Scale up again will be ok:
kubectl scale statefulsets tdengine --replicas=3
show dnodes results:
   id   |            endpoint            | vnodes | support_vnodes |   status   |       create_time       |              note              |
============================================================================================================================================
      1 | tdengine-0.taosd.default.sv... |      0 |            256 | ready      | 2022-06-22 15:29:49.049 |                                |
      2 | tdengine-1.taosd.default.sv... |      0 |            256 | ready      | 2022-06-22 15:30:11.895 |                                |
      3 | tdengine-2.taosd.default.sv... |      0 |            256 | ready      | 2022-06-22 15:30:33.007 |                                |
      5 | tdengine-3.taosd.default.sv... |      0 |            256 | ready      | 2022-06-22 15:34:35.520 |                                |
Let's do something BAD Case 1
Scale it up to 4 and then scale down to 2 directly. Deleted pods are offline now:
Welcome to the TDengine shell from Linux, Client Version:2.1.1.0
Copyright (c) 2020 by TAOS Data, Inc. All rights reserved.

taos> show dnodes
   id   |            endpoint            | vnodes | support_vnodes |   status   |       create_time       |              note              |
============================================================================================================================================
      1 | tdengine-0.taosd.default.sv... |      0 |            256 | ready      | 2022-06-22 15:29:49.049 |                                |
      2 | tdengine-1.taosd.default.sv... |      0 |            256 | ready      | 2022-06-22 15:30:11.895 |                                |
      3 | tdengine-2.taosd.default.sv... |      0 |            256 | offline    | 2022-06-22 15:30:33.007 | status msg timeout             |
      5 | tdengine-3.taosd.default.sv... |      0 |            256 | offline    | 2022-06-22 15:34:35.520 | status msg timeout             ||
Query OK, 4 row(s) in set (0.004293s)
But we can't drop tje offline dnodes, the dnode will stuck in dropping mode (if you call drop dnode 'fqdn:6030').
Let's do something BAD Case 2
Note that if the remaining dnodes is less than the database replica, it will cause error until you scale it up again.
Create database with replica 3, and insert data to a table:
kubectl exec -i -t tdengine-0 -- \
  taos -s \
  "create database if not exists test replica 2;
   use test;
   create table if not exists t1(ts timestamp, n int);
   insert into t1 values(now, 1)(now+1s, 2);"
Scale down to replica 1 (bad behavior):
kubectl scale statefulsets tdengine --replicas=1
Now in taos shell, all operations with database test are not valid.
So, before scale-down, please check the max value of replica among all databases, and be sure to do drop dnode step.
Clean Up TDengine StatefulSet
To complete remove tdengine statefulset, type:
kubectl delete statefulset -l app=tdengine
kubectl delete svc -l app=tdengine
kubectl delete pvc -l app=tdengine
Setup TDengine Cluster with helm
Is it simple enough? Let's do something more.
Install Helm
curl -fsSL -o get_helm.sh \
  https://raw.githubusercontent.com/helm/helm/master/scripts/get-helm-3
chmod +x get_helm.sh
./get_helm.sh
Helm will use kubectl and the kubeconfig setted in chapter 1.
Install TDengine Chart
Download TDengine chart.
wget https://github.com/taosdata/TDengine-Operator/raw/main/helm/tdengine-3.0.2.tgz
First, check your sotrage class name:
kubectl get storageclass
In minikube, the default storageclass name is standard.
And then deploy TDengine in one line:
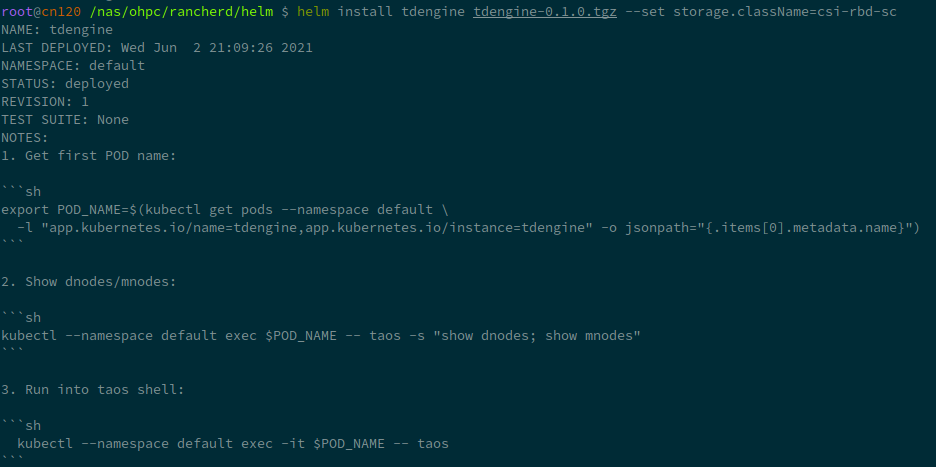
helm install tdengine tdengine-3.0.2.tgz \
  --set storage.className=<your storage class name>
If you are using minikube, you may want a smaller storage size for TDengine:
helm install tdengine tdengine-3.0.2.tgz \
  --set storage.className=standard \
  --set storage.dataSize=2Gi \
  --set storage.logSize=10Mi
If success, it will show an minimal usage of TDengine.
export POD_NAME=$(kubectl get pods --namespace default \
-l "app.kubernetes.io/name=tdengine,app.kubernetes.io/instance=tdengine" \
-o jsonpath="{.items[0].metadata.name}")
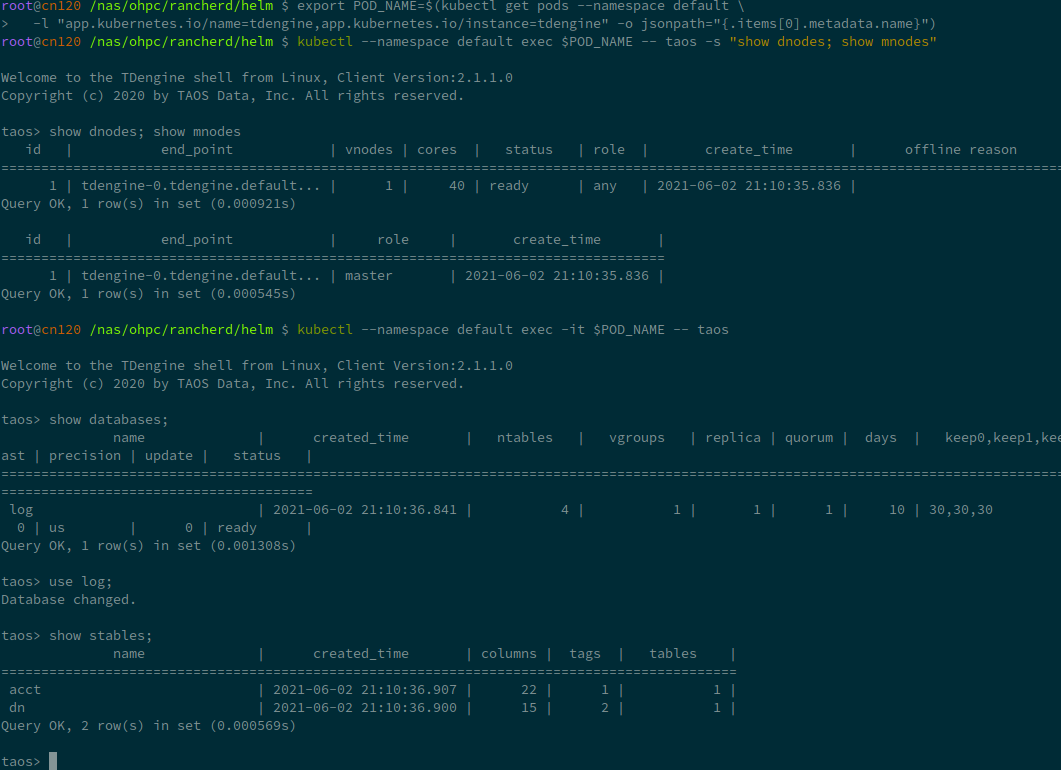
kubectl --namespace default exec $POD_NAME -- taos -s "show dnodes; show mnodes"
kubectl --namespace default exec -it $POD_NAME -- taos
You can try it by yourself:
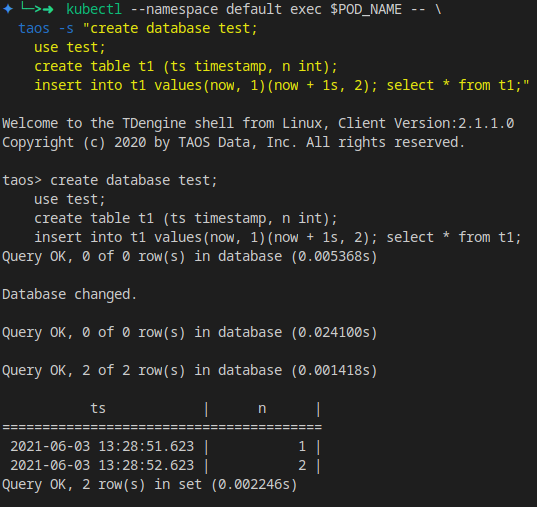
For a small sql test:
kubectl --namespace default exec $POD_NAME -- \
  taos -s "create database test;
    use test;
    create table t1 (ts timestamp, n int);
    insert into t1 values(now, 1)(now + 1s, 2);
    select * from t1;"
Values
TDengine support values.yaml append.
To see a full list of values, use helm show values:
helm show values tdengine-3.0.2.tgz
You cound save it to values.yaml, and do some changs on it, like replica count, storage class name, and so on. Then type:
helm install tdengine tdengine-3.0.2.tgz -f values.yaml
The full list of values:
# Default values for tdengine.
# This is a YAML-formatted file.
# Declare variables to be passed into helm templates.

replicaCount: 1

image:
  prefix: tdengine/tdengine
  #pullPolicy: Always
  # Overrides the image tag whose default is the chart appVersion.
#  tag: "3.0.0.0"

service:
  # ClusterIP is the default service type, use NodeIP only if you know what you are doing.
  type: ClusterIP
  ports:
    # TCP range required
    tcp: [6030, 6041, 6042, 6043, 6044, 6046, 6047, 6048, 6049, 6060]
    # UDP range
    udp: [6044, 6045]


# Set timezone here, not in taoscfg
timezone: "Asia/Shanghai"

resources:
  # We usually recommend not to specify default resources and to leave this as a conscious
  # choice for the user. This also increases chances charts run on environments with little
  # resources, such as Minikube. If you do want to specify resources, uncomment the following
  # lines, adjust them as necessary, and remove the curly braces after 'resources:'.
  # limits:
  #   cpu: 100m
  #   memory: 128Mi
  # requests:
  #   cpu: 100m
  #   memory: 128Mi

storage:
  # Set storageClassName for pvc. K8s use default storage class if not set.
  #
  className: ""
  dataSize: "100Gi"
  logSize: "10Gi"

nodeSelectors:
  taosd:
    # node selectors

clusterDomainSuffix: ""
# Config settings in taos.cfg file.
#
# The helm/k8s support will use environment variables for taos.cfg,
# converting an upper-snake-cased variable like `TAOS_DEBUG_FLAG`,
# to a camelCase taos config variable `debugFlag`.
#
# See the variable list at https://www.taosdata.com/cn/documentation/administrator .
#
# Note:
# 1. firstEp/secondEp: should not be setted here, it's auto generated at scale-up.
# 2. serverPort: should not be setted, we'll use the default 6030 in many places.
# 3. fqdn: will be auto generated in kubenetes, user should not care about it.
# 4. role: currently role is not supported - every node is able to be mnode and vnode.
#
# Btw, keep quotes "" around the value like below, even the value will be number or not.
taoscfg:
  # Starts as cluster or not, must be 0 or 1.
  #   0: all pods will start as a seperate TDengine server
  #   1: pods will start as TDengine server cluster. [default]
  CLUSTER: "1"

  # number of replications, for cluster only
  TAOS_REPLICA: "1"


  #
  # TAOS_NUM_OF_RPC_THREADS: number of threads for RPC
  #TAOS_NUM_OF_RPC_THREADS: "2"

  #
  # TAOS_NUM_OF_COMMIT_THREADS: number of threads to commit cache data
  #TAOS_NUM_OF_COMMIT_THREADS: "4"

  # enable/disable installation / usage report
  #TAOS_TELEMETRY_REPORTING: "1"

  # time interval of system monitor, seconds
  #TAOS_MONITOR_INTERVAL: "30"

  # time interval of dnode status reporting to mnode, seconds, for cluster only
  #TAOS_STATUS_INTERVAL: "1"

  # time interval of heart beat from shell to dnode, seconds
  #TAOS_SHELL_ACTIVITY_TIMER: "3"

  # minimum sliding window time, milli-second
  #TAOS_MIN_SLIDING_TIME: "10"

  # minimum time window, milli-second
  #TAOS_MIN_INTERVAL_TIME: "1"

  # the compressed rpc message, option:
  #  -1 (no compression)
  #   0 (all message compressed),
  # > 0 (rpc message body which larger than this value will be compressed)
  #TAOS_COMPRESS_MSG_SIZE: "-1"

  # max number of connections allowed in dnode
  #TAOS_MAX_SHELL_CONNS: "50000"

  # stop writing logs when the disk size of the log folder is less than this value
  #TAOS_MINIMAL_LOG_DIR_G_B: "0.1"

  # stop writing temporary files when the disk size of the tmp folder is less than this value
  #TAOS_MINIMAL_TMP_DIR_G_B: "0.1"

  # if disk free space is less than this value, taosd service exit directly within startup process
  #TAOS_MINIMAL_DATA_DIR_G_B: "0.1"

  # One mnode is equal to the number of vnode consumed
  #TAOS_MNODE_EQUAL_VNODE_NUM: "4"

  # enbale/disable http service
  #TAOS_HTTP: "1"

  # enable/disable system monitor
  #TAOS_MONITOR: "1"

  # enable/disable async log
  #TAOS_ASYNC_LOG: "1"

  #
  # time of keeping log files, days
  #TAOS_LOG_KEEP_DAYS: "0"

  # The following parameters are used for debug purpose only.
  # debugFlag 8 bits mask: FILE-SCREEN-UNUSED-HeartBeat-DUMP-TRACE_WARN-ERROR
  # 131: output warning and error
  # 135: output debug, warning and error
  # 143: output trace, debug, warning and error to log
  # 199: output debug, warning and error to both screen and file
  # 207: output trace, debug, warning and error to both screen and file
  #
  # debug flag for all log type, take effect when non-zero value\
  #TAOS_DEBUG_FLAG: "143"

  # generate core file when service crash
  #TAOS_ENABLE_CORE_FILE: "1"
Scale Up
You could see the details in chapter 4.
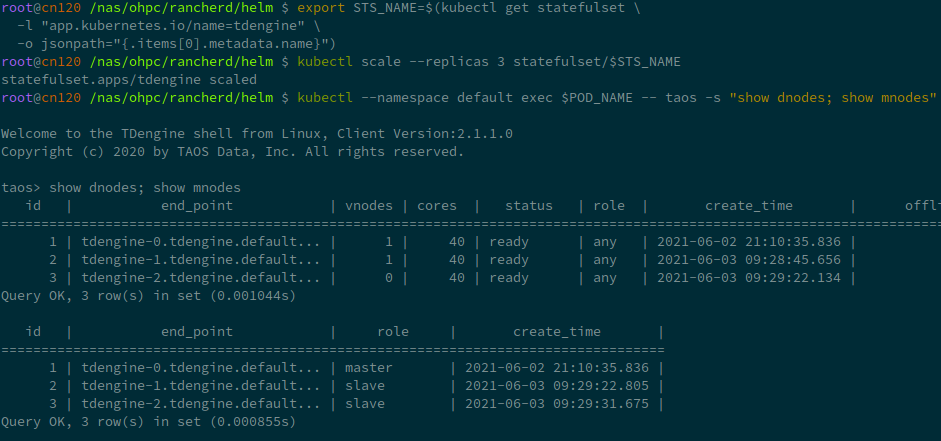
First, we should get the statefulset name in your deploy:
export STS_NAME=$(kubectl get statefulset \
  -l "app.kubernetes.io/name=tdengine" \
  -o jsonpath="{.items[0].metadata.name}")
Scale up is very simple, the next line scale up the TDengine dnodes to 3, no other commands required.
kubectl scale --replicas 3 statefulset/$STS_NAME
Re-call show dnodes show mnodes to check:
Scale Down
NOTE: scale-down is not completely work as expected, use it with caution.
Also, scale down requires some extra step:
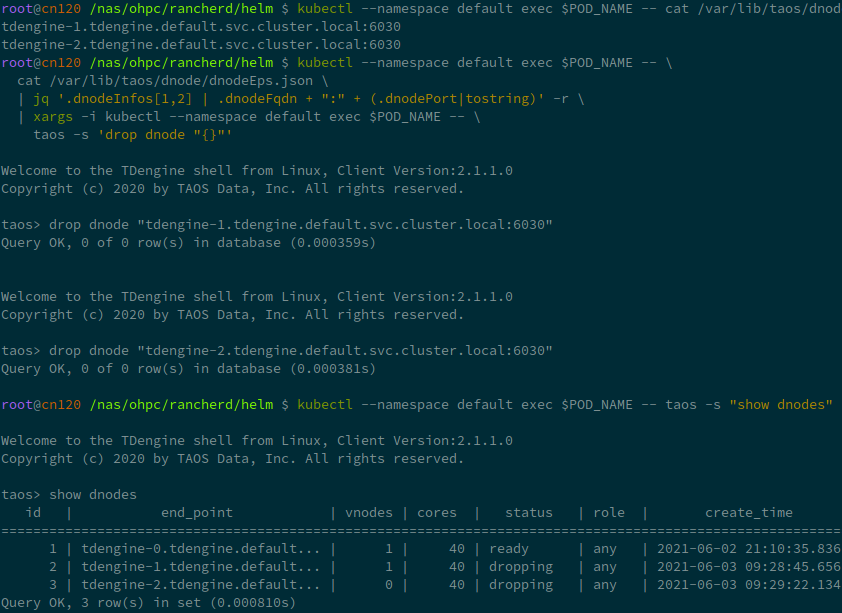
Get the dnode endpoint and drop it iteratively:
kubectl --namespace default exec $POD_NAME -- \
  cat /var/lib/taos/dnode/dnodeEps.json \
  | jq '.dnodeInfos[1:] |map(.dnodeFqdn + ":" + (.dnodePort|tostring)) | .[]' -r
kubectl --namespace default exec $POD_NAME -- taos -s "show dnodes"
kubectl --namespace default exec $POD_NAME -- taos -s 'drop dnode "<you dnode in list>"'
Drop one dnode may cause several seconds or minutes.
Uninstall
helm uninstall tdengine
Helm doest not automatically drop pvc by now, you can drop it manually.